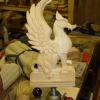
If we call the bosting in the first 'pass', then 'refining is our second pass, firming up our sense of the form.
This stage is really still bosting in, writ more accurately. We are making a series of carving 'passes', so that the whole carving proceeds as a whole - and that's the important point. This second pass takes the block-like work we did before and moves it on, so the carving looks more and more what we had in mind.
Here we look at the eyes, beak and head.

| 02 February 2017 10:03
Karen - If I'd worked down from the centre line, I would be carving against the grain and would more than likely pop off the tip of the beak. Carving the beak upwards and into the wood like this, I am carving with the grain, and safe.
All my gouges have inner bevels. However sometimes they are quite long or merge in a shiny way with the blade metal inside the gouge and thus are not very obvious. So, yes, your imagination!

| 01 February 2017 16:09
It is inspiring to see you go about obtaining the form of the bird, the process involved which I assume can be applied for any similar project. On the post why did you not go from the center line out as you removed wood with the chisel? Was it my imagination Chris or did I actually see one of the gouges that did not have an inner bevel?

| 29 November 2016 18:17
Karen - Yes, there is a general approach, a way of working, a process even, that I apply to carvings. Because I understand this, I can tackle, say, a merlin, which I've never carved before. Even though you may not want to carve any of the projects on the site, if you absorb the sort of steps I take, you'll be able to take on a wide range of carvings.
The home-made square, which appears in the next video in the series (at about 4:10)is something I made from an old credit card. I keep old cards because the stiff plastic is just right for all sorts of templates.
I've never used Play-Doh but it's cheap so worth the experiment. BTW There are some lessons on the site about clay. Modelling clay does work out a lot cheaper in the long run.

| 27 February 2012 18:53
I have been working on a carving of a Griffon for about 6 months now. I use it as a warm up when I first go into the shop in the mornings. But I finally reached reached an impass, and didn't know how to proceed. I had no real plan or focus. This Episode where you focus on the beak and then work back from there has been most helpful. It gave me a path to follow - a plan. I realize that as a beginning carver I have (as usual) chosen a project which is highly detailed and perhaps beyond my current skill level. But since I focused on the beak of the bird it has come a long way. Who knows, I might even finish it in another 6 months! LOL

| 29 December 2011 21:14
I've taken you up on your suggestion to do a clay model first, and am glad that I did. I've used this technique for my last two carvings and it has really paid dividends, especially in the roughing out phase. I am surprised how easy it is to get lost when working a big block of wood with a Lancelot. I refer to the model frequently to decide what to leave on. I differ a bit in that I use, and reuse Sculpy (plasticine). Reconditioning it takes a bit of time, but is theraputic.

| 30 November 2011 18:00
Deborah - Mostly it's about visualisation: can I 'see' what I'm aiming at; do I know what I'm doing? The clay model is a great help with that issue. Sometimes I'll do a part in wood, sure. That's a bit more about how I'll render what I'm after: what tools, what cuts, what effect? etc. While 'carving wood back on' is often possible, you often only get a couple of passes with the magic wand, so it's far better to plan and be sure (enough) of a difficult area, in any way you can, before committing yourself to deeply into the carving.

| 30 November 2011 08:13
Chris, do you or did you ever find it helpful to carve problem areas (talons, beak/brow/eye) in waste-stock, or can you always develop enough of a feel from the clay model?