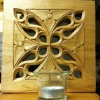
Right from the start I knew I had a crack in the wood. If this was a carving for a client then, unless it was their wood, I would find another piece. But it was a piece of Elm: a precious and beautiful wood and I wanted to use it. (I still have a heartache that we lost these magnificent trees in the UK; my children have never seen one, let alone climbed one as I did.) By the time I had finished carving the crack was stable and I'll show you how I repaired it - quite invisibly once the wood was waxed.
A more serious 'problem' was the way the wood had warped and that had a lot to do with the juxtaposition of thick wood with thin. Looking face on, at the correct viewing point, you don't even notice it, but you do from the side. If I had left thicker wood then I could have flattened the back and corrected the warp. I didn't, so the only solution that made sense will be to fit the carving into a frame.

| 11 August 2020 17:00
Tony - Yes, oil certainly makes the wood darker, which is why I can mix and match a darker (oil) finish with a lighter (wax) one in some carvings. You'll have to decide which part gets what!
You shouldn't need more than 2 coats of oil, which I always thin with 10% turps.
You can use a matt acrylic varnish on the raw wood before waxing, but not with the oil. If you want to seal the oil, you need a shellac-based polish.

| 10 August 2020 18:04
Chris... how many coats of oil/varnish do you suggest for the dory? Would 2 or 3 coats of the oil make the carving slightly darker?

| 29 May 2019 08:31
Jim - If your look at video #1, around 5:38, you'll see that I orientated the wood with the centre of the tree away from the wall, so that if/when the board warped, the edges would move towards the wall. And this is really all you can do with this sort of slash-sawn board. The interesting thing that I've found over the years is that lumps of thicker wood in a relief with pull on the fibres, so despite orientating the wood this way it still warped. Ideally I would have had quarter sawn but I've seen this happen with that too. Elm is notorious for moving - not that I ever, tragically, see much of it these days, and this board was about 30 years old.

| 28 May 2019 13:49
Chris, The reason the wood warped is the way the wood was cut with the grain. When wood is cut flat or plain sawn there is a greater chance that it will warp or twist. It is done because there is less waste and less expensive. When quarter sawed the grain is straighter Less chance of it warping or cupping. You will also get a different grain pattern with different cuts on the face of the wood. It's sad that Dutch Elm Disease has devastated native populations of Elms. The disease is caused by sac fungi and is spread elm bark beetles. I lost all my pine trees on my property caused by bark beetles. They all had to be cut down. It is a big reason for the fires on the west coast of the United States.

| 04 February 2019 23:15
Very interesting project. The two finishes applied were a perfect choice to highlight the various elements.
Charles

| 07 January 2017 16:08
Enjoyed this lesson on how to fix a crack. It was very informative, in fact the whole video series from 1 to 10 has been very enjoyable to watch.

| 15 July 2016 11:47
Laurent - You'll get more sheen if you add a little Carnauba wax. There's a little series in the Carving Matters section where you'll see me making it. In the meantime, you might try making your mixture more wax or a second coat.

| 13 July 2016 05:34
This is one beautiful carving!
Chris how do you get this nice sheen when you finish with wax? No matter what i do, my wax finish always seems dry with no sheen at all.

| 13 April 2015 11:11
Duncan - Those are good questions and you seem to have the answers worked out yourself! It's ALL about light and shadow - based on where you think the light source will come from. And, in relief carving, it's all about fooling the viewer, hence perspective and picking a good picture to begin with. I hope we get to see your dory in the gallery!

| 02 April 2015 17:13
Most often you seem to use a step down to cast a shadow to indicate an edge. Are there times you would step up (angled face) to catch the light like a highlight? Thinking about it the gunnel is just that.
Are there also tricks to enhance the look of "roundness" despite being nearly flat. Sketchers use shading or darker lines? I guess part of the secret is picking a picture, like the boat, that lends itself to the illusion. Clean sharp detail in the foreground with softer curves leading away.

| 26 August 2014 07:26
Ann - I've never stained a relief in that way but my thinking would go along the lines of: stronger rielief, shadows etc happens in the foreground of a carving, receding with with lighter, softer carving into the distance. So I'd follow that pattern with colour - stronger to the front, ligher to the distance. I'm sure you'll test your stains and test on spare wood first. You might find a way of washing the colour across by wetting the surface with thinner first, rather like using watercolour paints. Looking forward to seeing your dory in the gallery!

| 25 August 2014 11:59
Chris, thinking of using 2-3 tones of wood stain on my Coastal Relief which is lime wood (linden), would darker go more in the foreground moving lighter going back, or the opposite, for enhancing the perspective?

| 01 May 2014 14:01
Charles - I have added a large picture of the completed carving to the download, which I think is what you are after. Incidentally, one of the best things to do if you want an image of what I am carving, or the finished work (of which we always give you an unobstucted view at the end of the project), is to pause the video and print a screen shot.

| 29 April 2014 16:07
Hello Chris, Great project. Where in this series can I obtain an unobstructed view of the "Coastal Relief" layout that will allow me to down load on to my computer ?
Thanks for the great teaching videos, they are a huge help especially to those of us who are just beginning.
Charles

| 30 March 2014 15:24
Derrick & Nick - I've added a picture to the download for this project. I carved the relief about a year ago, even though we've only recently published it, so the picture shows the oil/wax finsih after about 12 months. The difference is quite clear, and I think quite attractive. As to the frame - still working on that one. Don't hold your breath!

| 30 March 2014 03:19
I agree. I would love to see the variation of how the oil versus wax both age. I can't wait to see it!

| 19 March 2014 18:36
Chris, do you think you could post a picture of the carving once it is in the frame? It would be nice to see, also maybe a follow up picture in a few months if the color contrast in the oil and wax becomes more evident. Thanks for the great relief workshop!